
Showing posts with label cheap wedding. Show all posts
Showing posts with label cheap wedding. Show all posts
Sunday, July 31, 2011
Paper Flower Topiary Project Begins

Make your own stamps (Photopolymer Stamp Tutorial )

It is not hard or expensive to make your own custom stamps.
You will need
photopolymer sheet ( I used polyester backed purchased from www.wholelottawhimsy.com You also can get them from places like boxcarpress
Light with 60 watt (halogen, and uv work better)
transparency paper
printer
image
water
scrub brush
Cheap picture frame
bubble wrap
4 binder clips

First print your image in negative/positive on your transparency paper. A negative area will be white the positive will be black. I have a laser printer. They do make them of ink jet too. I bought my paper off amazon 50 sheets for $12.00 You are not limited to line drawings. You actually can print photos like this

Make sure the lines are not too thin
 | ||
| The right eye is too thin :( |
Stack

Start with the back of the picture frame

Then add bubble wrap

Next add your photopolymer sheet ( take it out of the bag). You can cut it down if necessary and use it later. Please do so in a dark place and store in absolute darkness.

Then add your negative/positive.

Place the glass on top and clamp it up :)
Light

Place under a light about 5-6 inches above your frame.
Wait...
It took me 30 minutes to get good results. Please do a test before you start on a big piece.Halogen lamps take less time, black lights/uv lights are ideal and can take about 3 min. Many have found nail dryers to work wonderful.
Scrub

Scrub in circular motions...NOT TOO HARD! Wash away all the sticky gel with water.
Final Cure

Dry with hair dryer and place back under light for about the same time.
Done

Glue the stamp on a stamping block or piece of wood.
Saturday, July 23, 2011
Painted my stepping stone chargers

I think they turned out very well. I originally just spray painted them gold but they looked like cheap gold coins. I painted them black first and applied the gold over it. I am happy with them :)
****Use breathable paint designed for concrete. Let stones cure for at least 28 days before painting they WILL crumble :(
Friday, July 22, 2011
Cheap Flower pots Fantastic :) MY Decoupage Adventure

I took advantage of a 75% off summer clearance and bought all my flower pots for my centerpieces .43 a piece for 10" pots. The down part they are plastic. don't even look real. I spray painted them gold. They looked even cheaper than before. What to do? Decoupage!!! I think my first one turned out fabulous. I can't wait to assemble my branch centerpieces.
 | ||
| Before |

How did I do this? Glue, white tissue paper, gold paint and a stamper.
Tutorial to come soon !
 |
| Yes, I cut the plastic rim off too. |
Friday, July 15, 2011
Stepping Stone Charger Plate Tutorial

I have had a few emails on the subject of stepping stones. Is really that easy. Yes! It won't take you forever to make them ether. Will I need special tools or equipment? No! All you really need is a bucket, water concert mix and a place to put it. You actually don't need to buy a mold you can make an imprint in wet sand and pour your mix in. So technically you can get this done by a simple trip to the beach...if no one complains :)
Materials
Water
bucket
something to mix with
Fast setting concrete mix (I use quick-rite fast-setting mix)
mold or wet sand
oil,shortening or pam
*Styrofoam if making light wight version here
Prep you mold

If you are using a plastic mold then you will need to oil it up. Personally I use veg shortening just because it is on hand. If you are using wet sand, imprint it with a pan or other stepping stone.
Measure & Mix

I use a 5 parts of mix to 1 part of water...It works good for me. Measure out you mix and pour water in slowly. Stir well try to work quickly the concrete sets fast.
 |
| It will look like this. |

Glop all your mix in your mold. Yes, you are going to say I did this wrong. It is so lumpy. Why is it so lumpy! Don't worry just spread it out :)
Shake
Now to take care of lumps. Shake the heck out of the mold. It helps remove air bubbles and smooth things out. Most of the lumps will be gone. The stubborn stones sticking far out I remove. Ones that are just above the surface I usually leave alone.
Wait

Probably the worst step ever the wait. Usually 30-45 minutes. The stepping stone should have changed colors slightly and firmed up quite a bit. If it feels soft and leaves a finger print leave it alone.
De mold

Carefully flip the stone over on the other side and gently tug on the sides you should see it start to lift.
Curing
Place your stone in a plastic garbage bag and forget about it for a week.
Painting
Stone must cure for about 28 days before painting. The surface must be scrubbed with a mild soap solution or vinegar, then allowed to dry before the application of paint. Check out here for more info on painting
Monday, June 27, 2011
Easy Paper Flower Tutorial

I am not sure right now what to call this flower I was originally going for a ranunculus. This kinda looks like a rose/ peony.
You will need:

Scissors
Hot glue gun
Template
Pencil
Printer paper
Piece of foam(I used an egg crate...a pillow would work.)
Brats
rounded instrument (like the end of make up brush)
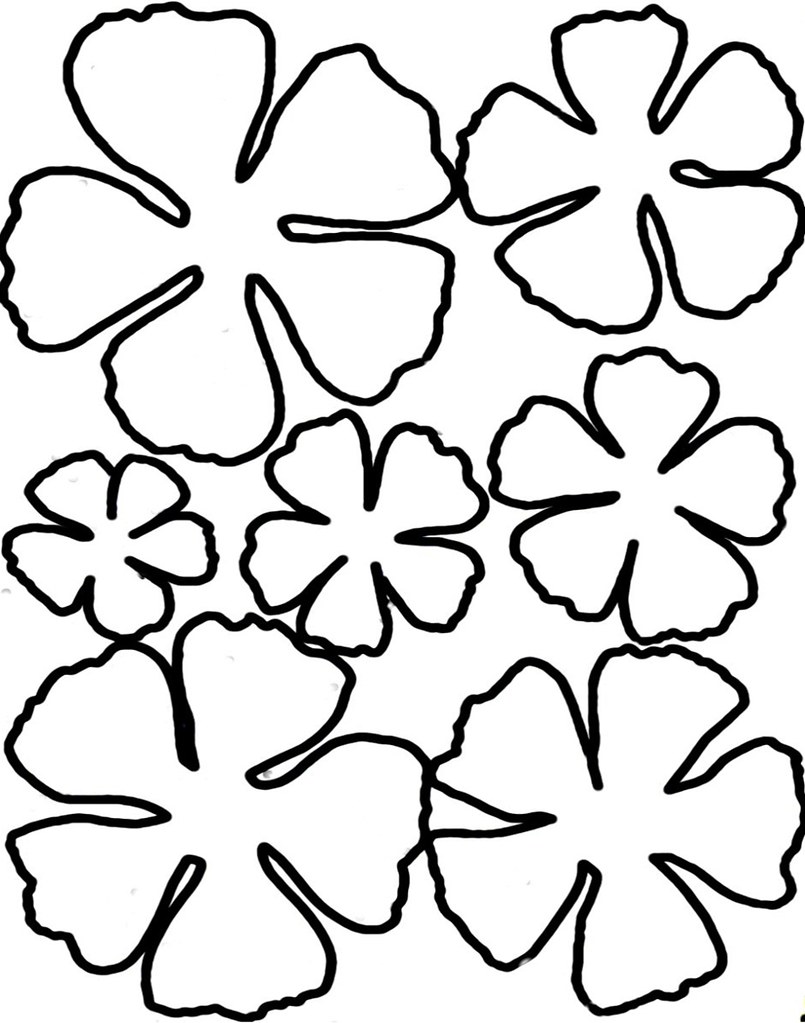
Templates:
Print your templates Make sure to "scale to fit page" when printing. I used decrease margins too.
Cut:
Use 2 sheets of paper for every flower. I can cut 8 flowers out at a time...but this will depend on your scissors. I also cut on the out side line rather than inside...I like big flowers :)I know I sacrifice the top sheet!
(((Important tip: NUMBER YOUR FLOWERS 1-7 One is the smallest flower and seven the largest )))
 | |
| I am using my original hand drawn template here. I now cheat and use the printed one :) |
 |
| Seven happy piles. |
Shape:

This is where the magic happens. Get your foam and your round ended tool (I used a kid toy shhhhh)Working on the flat side. Move the tool along the edge of your petals pressing fairly hard.

Like this :)

Now you have piles of crinkled paper.
Form Your Flowers:
Get your brat and both of your 1 petals (the smallest) pierce them and secure the brat (your flowers center).
You will be adding petals in this order 1,1,2,2,3,4,3,4,5,6,5,7,6,7
 | ||||||
| kinda cute |
Make a cabbage and glue the petals together. Be careful not to burn yourself!

Next add both petals #2
 | ||
| You will end up with something like this. |
Add layers to the "cabbage" by gluing the top of each petal and forming around your center. Gradually apply less glue to let the flower open.
 |
| Glue and press your flower down on each new layer. |
 | |
| Remember to over lap the layers or your flower will look funny. |
Enjoy:
Who knew just 2 pieces of printer paper could be so beautiful. You can add stems to your flowers by replacing the brat with floral wire and pierce through all the layers... Add stamens or a jewel.


Thursday, June 23, 2011


Monday, June 20, 2011
Paper Ranunculus Flower
I have been browsing for a solution to my flower budget dilemma. I think I have found it :) Paper ranunculus flowers. My inspiration from diy or don't ....unfortunately I don't own a fancy cutting machine and I don't have the extra $275 to spend on it. I do however own a pair of scissors and a hot glue gun. I made my own temple. Still working on making it perfect, but I think they turned out good.

(The tutorial is finally here with pattern/ temple!)

Friday, June 17, 2011
How to make Your Own Wedding Cake & Not Go Crazy(Part 1)

I am making a wedding cake for 100...this is my strategy plan. I would suggest watching the videos and practicing a few times. Yes you can make your own cake!
2 Week-2 Days Before Your Wedding
Make The Cake:
It took me 5 hrs to bake enough cake for a 4 tier. After your cake has cooled wrap it in plastic wrap and foil. Refrigerate the cake for a few hours until chilled. This will make it easier to level.
A few tutorials to help you bake a fool proof cake.
White Almond Sour Cream Cake & Chocolate Sour Cream Cake (Recipes) OMG EASY! virtually fool proof :) It can be made in any flavor even dairy free too by using soy yogurt. (I use ck brand cake mix )
How to Bake and Decorate a Cake This video is long but has a lot of good tips and tricks!
Useful charts:
Cake Servings Guide/ Chart
Cake Baking Time and Batter Amounts 3" deep 2" deep
Cake Cutting Guide
Level Your Cake:
How to Level Tort and Fill a Cake (seriously watch the video)
I am using a Wilton lever but you can do this with a long knife. Brush simple syrup on the cake. This helps keep the cake moist in the freezer.If you decided to tort your cake(split it in multiple layers) separate the layers with parchment paper. Make sure to use the cookie sheet technique so you don't have to re bake cake :)
How to make simple syrup
Freeze the cake!
Place cake on a cake board. Wrap it up extra good and freeze it. This will save you a lot of stress. You do not want to pull an all nigher. Some cakes do not freeze well but most do.
How to Freeze Cakes
Make Your Frosting:
You can make the butter cream ahead of time. Yep, you can freeze it! Just store it in a freezer bag. When ready to use. Defrost in a mixing bowl(this takes a few hours) and re-whip with a spoon.
No Fail Butter cream
The Night Before Your Wedding
Fill your cakes:
Place all of your cakes on a cake board the same size as each cake. Make a dam with frosting so filling won't leak out. Don't over fill please!
How To Fill A Cake
Crumb Coat:
Since your cake is already frozen. You don't need to re freeze it. spread a thin layer of frosting to trap all the crumbs...don't worry about it looking perfect. If you are using the upside down frosting method you can skip ahead.
How to crumb coat a cake
Frost The Cake:
I highly suggest using a Lazy Susan it makes things a heck of a lot easier. Also a 6" bench scraper or speckling knife are a must have and viva paper towels!
*If you want a very smooth cake try the upside down frosting method...It works like a charm! tutorial
upside down video here
How to frost a cake smooth (even if you are using the upside down method this is a handy video to watch)
Stack it:
There are a million and one ways people do this. I use plastic pillars and bubble tea straws.(I picked the straws up from an Asian food store but you also can get them online)Remember to put your base cake on a cake drum or Masonite board
How To Stack A Cake (This is the video I follow)
How to cover a cake board
Part 2 Will Cover Decorating
Thursday, June 16, 2011
Practice cakes & tastings
 |
| Butter cream cake with fondant leaves |
So, I had a tasting for a few brides on Monday. I think I did a good job on the cakes. They tasted amazing. The big hit was the Oreo cake. Every bride wanted...no needed to have it for her wedding. I did not have all my equipment yet and was working with makeshift pastry bags. Heck I'm only a beginner! My daughters b-day is Sunday hope to get some more practice in :)
 |
| Stenciled butter cream |
Thursday, June 2, 2011
FREE: Wedding Cake Baking And Decorating!
That's what I am offering lucky brides in Rochester NY before November. So far I have done a few. I can't wait to do more. I have 4 brides scheduled for the summer. All are having weddings between 70- 100 people. My first stacked cake turned out great. It is surprisingly easy working with fondant and gum paste. They sell molds and cutters. It's like play dough! I will TRY to make a tutorial on how to make your own wedding cake later.
For now Please check out Edna De la Cruz . She is amazing and her tutorials are too!
http://www.youtube.com/user/tonedna1
For now Please check out Edna De la Cruz . She is amazing and her tutorials are too!
http://www.youtube.com/user/tonedna1
 |
| My first stacked cake :) |
Stepping stone charger plates part 2

I am Back!
So... I have been incredibly busy. I will try to catch up writing all about my activities and diy projects. You may have read that we marred in private Feb 14th 2011. It was so beautiful and romantic. We will be renewing our vows in November. The church is gorgeous! I called over 50 churches(yes seriously!) and finally found one that would be perfect for both dates. It cost us $150 total! I decided to save on money and use my china made wedding dress. Eamon bought his tux from the mens warehouse 2 suits for 130! He sold one for $150 so...free tuxedo for us :)


Friday, February 4, 2011
Make Your Own Napkins!

Yes It could be as easy as ironing napkins!
For no cut napkins you could buy fat quarters.
For no sew napkins use heat bond hem tape.
Or do it the good ol old fashioned way like me
Both sew and no sew Tutorial by stone gable
This project is seriously taking forever! I found some gold satin at a thrift store. I paid pennies a yard. If you ever had the pleasures of working with some kinds of satin...like ribbon it unravels very easy. I had to heat seal every raw edge. This was such a pain! The napkins look fantastic but, if I would do it again I would use cotton.

Subscribe to:
Posts (Atom)